

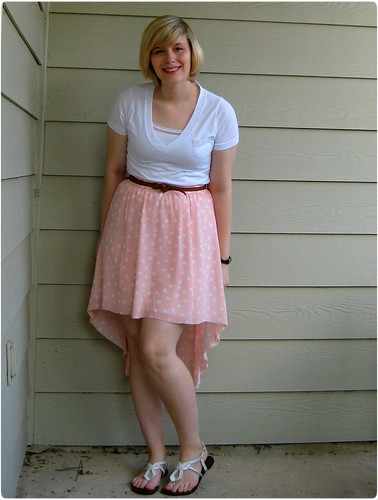
Yesterday, when I was walking around Goodwill, lamenting a cutely-patterned but ultimately ugly maxi skirt, I was hit with a brilliant idea -- maybe I could turn it into a mullet skirt myself. $7.99 and a couple of internet searches later, I combined a few methods and voila! soon created my first high-low skirt. Luckily, it was pretty simple (and only took about 15 minutes!) so I'll share it with you.
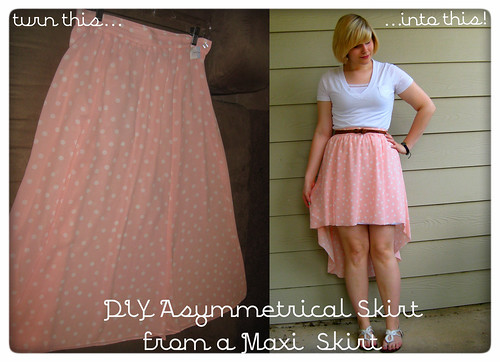
DIY: Asymmetrical Skirt from a Maxi Skirt
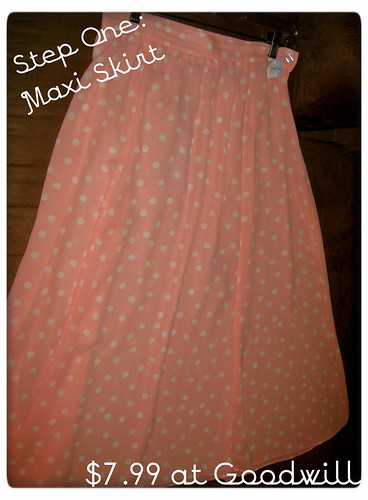
Step One: Choose your Maxi Skirt
I bought this lovely pink polka dotted one at Goodwill, but you could also use one you have lying around to try and breathe new life into it. Pleated maxi skirts turn into beautiful asymmetrical skirts.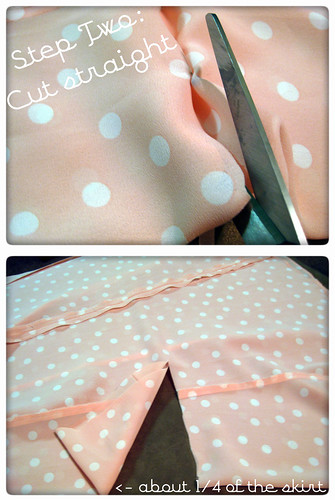
Step Two: Cut a Straight Line
Measure where you want the shortest part of the skirt to hit. I used another skirt that is flattering on me as a guide, but you could also use a measuring tape. I also pinned mine up to see before I made the first cut. Remember, you can always cut more, but you can't add fabric back. Better to cut too little and have to adjust than to ruin your skirt by cutting way too much off.Once you have measured where to cut the skirt, fold the skirt in half at the front, so that the edges are the middle of the front and back of the skirt. This part is a little confusing, but basically, we want to make sure the skirt is even on both sides, so fold it on its side. Cut straight about 1/4 of the way into the skirt. This should be the front side of the skirt.
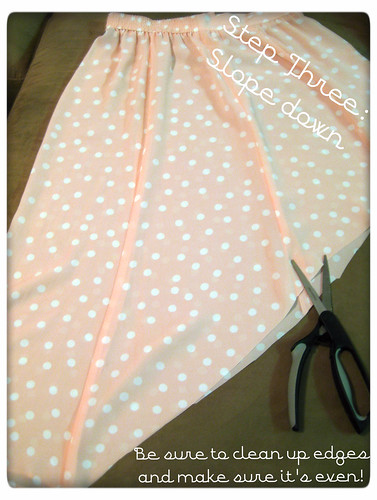
Step Three: Slope Downward
From now till the end of the skirt, slope downward. I didn't use any guide or measurements and I think my skirt came out fabulous! Make sure to go back to clean up and ensure that each side is evenly cut. As you can see in this picture, my skirt was not quite even yet. Try to cut as smoothly as possible -- no jagged edges!Step Four: Seal the Edges with a Lighter
Okay, I know this sounds crazy, but trust me here. Everything I read said that hemming the skirt would weigh it down too much, ruining the waterfall-like effect of the skirt and being obvious due to the sheerness of the fabric. A solution? Seal the edges of the skirt with a lighter! Be careful not to hurt yourself and be sure to move quickly, otherwise you risk burning your skirt. Now, the edges won't fray.Ta-da! Quick, simple, and now you have a new mullet skirt!
How to Wear an Asymmetrical Skirt: Quick Tips
- These skirts are great for showing off cute shoes. Heels work best, but even if you're not a heels girl (like myself), these skirts will definitely draw attention to your feet.
- Try wearing the highest part on your side instead of directly in the front for a fun twist.
- Mix it up in the winter by pairing your skirt with tights and boots.
- Patterned and pleated hi-low skirts are a little dressier than plain-colored skirts, so choose accordingly!
Let me know if you found this tutorial useful in the comments section. If you make your own skirt, I'd love to see a picture!